Amigurumi Polar Bear Free Pattern
Amigurumi Polar Bear Pattern
While I was out shopping the other day, I found some white velvet yarn that was so soft and fluffy. I was trying to think of something I could make with it, and I came up with a polar bear. This pattern would be perfect to give to a toddler or child since it's so soft and cuddly, or just to make for yourself! I used velvet yarn for this one, but you could use any type of yarn and the recommended hook size. To make sure your stitches will be tight enough to not show the stuffing inside, you may want to go down a hook size or two. This pattern is similar to my bear pattern, but with a few alterations. I hope you enjoy making it!

Please do not copy this pattern as your own or republish the pattern in any way. If you make this bear be sure to tag me or send me pictures on Instagram, @teen_crocheter! I’d love to see your work!
Materials
Less than 90 yards of white yarn of your choice (I used “Baby Bee Adore-A-Ball” in the color “Angel”)
Recommended hook size for your yarn (I used a 7mm hook)
Yarn needle
Safety eyes of your choice (I used 14 mm)
Polyester Fiberfill
Stitch Marker (optional)
Abbreviations Used
Sc: Single Crochet
Inc: Increase
Dec: decrease
St: stitch
BLO: Back loops only
FO: Fasten off
Other Pattern Notes
Gauge isn’t important for this project! Your bear will be bigger or smaller depending on the type of yarn and hook size you use.
Uses US crochet terms
Worked in continuous rounds
If you use a stitch marker, move it up each round
Head and Body
Round 1: 6 sc in a magic ring (6)
Round 2: Inc in each st around (12)
Round 3: Sc, inc, repeat around (18)
Round 4: 2 sc, inc, repeat around (24)
- Round 5: 3 sc, inc, repeat around (30)

Round 6: 4 sc, inc, repeat around (36)
Rounds 7-12: sc around (36)
Round 13: 4 sc, dec, repeat around (30)
Round 14: 3 sc, dec, repeat around (24)
Insert Safety eyes between rounds 9 and 10, 6 stitches apart.
Stuff head.
Round 15: 2 sc, dec, repeat around (18)
Round 16: sc, dec, repeat around (12)
The head is now done. Continue on to make the body.
Round 17: sc around (12)
Round 18: sc, inc, repeat around (18)
Round 19: 2 sc, inc, repeat around (24)
Rounds 20-24: sc around (24)
Stuff the body.
Round 25: 2 sc, dec, repeat around (18)
Round 26: In BLO, sc, dec, around (12)
Add more stuffing if needed
Round 27: In both loops now, dec around (6)
FO and sew hole closed. Weave in ends.

Legs (Make 2)
Round 1: 6 sc in a magic ring (6)
Round 2: inc in each st around (12)
Round 3: 3 sc, inc, repeat around (15)
Round 4: 3 sc, dec, repeat around (12)
Round 5: 2 sc, dec, repeat around (9)
Arms (Make 2)
Round 1: 6 Sc in a magic ring (6)
Round 2: Inc in each st around (12)
Round 3: 2 sc, dec, repeat around (9)
Rounds 4-6: Sc in each st around (9)
Round 7: Sc, dec, repeat around (6)
Stuff lightly, fold in half and crochet the two sides together
FO, leaving a long tail for sewing
Muzzle
Round 1: 6 sc in magic ring (6)
Round 2: inc in each st around (12)
Round 3: sc, inc, repeat around (18)
Round 4: sc around (18)
FO, leaving a long tail for sewing
Tail
- Round 1: 6 sc in a magic ring

Round 2: inc, around (12)
Round 3: sc around (12)
Round 4: 2 sc, dec, repeat around (9)
Round 5: sc around
Stuff and FO leaving a long tail for sewing.

Ears (Make 2)
Round 1: 6 sc in a magic ring
Round 2: inc in each st around (12)
Round 3: sc, inc, repeat around (18)
Rounds 4-5: sc around (18)
Round 6: sc, dec, repeat around (12)
FO, leaving a long tail for sewing
Assembly
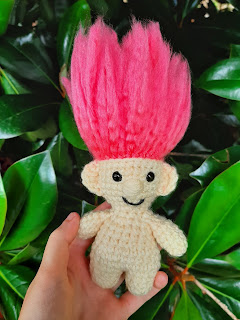
Use the pictures as a guide to help you:
Sew ears to head
Sew nose onto muzzle using black yarn
I didn't do this on mine, but if you wanted you could add eyelashes by stitching them on with black yarn
Sew tail onto body
Sew legs onto body
Sew arms onto body
Congrats! Your bear is now finished. I hope you love it! :)


Comments
Post a Comment